
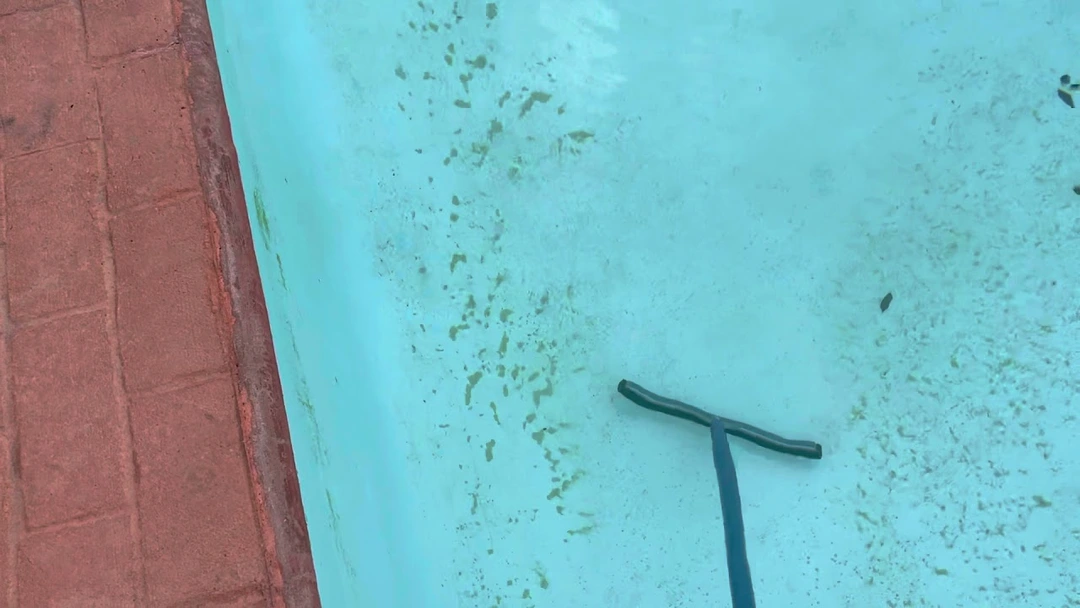
You walk out to your pool, notice some yellowish, powdery dust settled on the floor or steps, and brush it away. It vanishes instantly. You think you’re good. But 24 hours later, it’s right back in the exact same spot.
Congratulations: You’re dealing with mustard algae.
Unlike standard green algae, which floats around and turns your entire pool into a swamp, mustard algae is a master of disguise. It clings to walls, hides in the shadows (like behind your pool light or under the ladder steps), and is uniquely resistant to normal chlorine levels.
If you treat it like regular algae, you will lose. Defeating mustard algae requires a coordinated, aggressive strike. Here is the exact DIY protocol to get rid of it and ensure it never returns.
Is It Mustard Algae… Or Just Dirt?
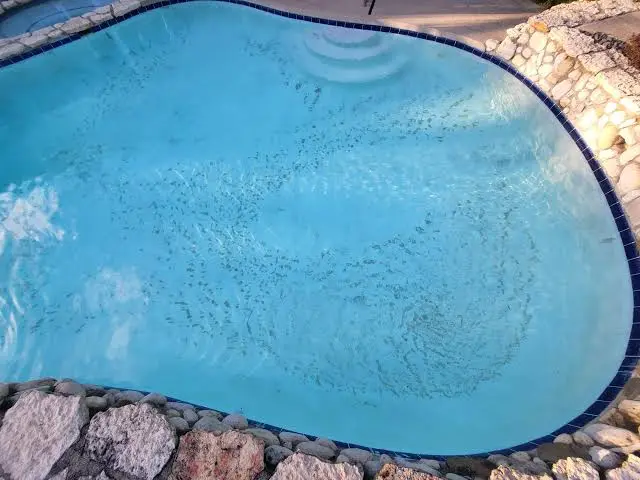
Before you dump gallons of chlorine into your water, you need to make sure you’re actually fighting algae. Mustard algae is famous for looking exactly like everyday pool debris, specifically sand, silt, or yellow tree pollen.
Treating sand with a triple-shock is a massive waste of money, while ignoring actual algae will let it spread until it takes over the entire pool.
Here are three simple field tests you can run in under five minutes to know exactly what you’re dealing with.
Test 1: The Location Clue
Look at where the substance is gathering. Regular dirt and heavy windblown sand will always obey gravity and settle at the absolute lowest points of your pool floor, usually around the main drains.
Mustard algae is alive and searches for places to anchor. It will gladly cling to the vertical walls, settle on the steps, hide in the tight corners of your plastic skim plates, or congregate on the shady side of the pool where the sun doesn’t hit directly. If it’s sticking to a wall, it isn’t sand.
Test 2: The Physical Touch Test
Reach down with your hand or use your pool brush to gently disturb the patch.
If it’s sand or silt: It will feel gritty between your fingers. When brushed, the heavy particles will briefly scatter but settle right back down to the floor almost immediately in the same general area.
If it’s mustard algae: It will feel slimy or completely weightless. When you brush it, it doesn’t scatter—it poofs into a cloudy mist and disappears into the water completely, remaining suspended for hours.
Test 3: The “Poof” and Return Speed
This is the definitive test. Grab your pool brush and sweep the mysterious substance away until the spot looks perfectly clean.
If it’s pollen or dust: It takes a windy day or several hours for new debris to blow into the pool and settle back down.
If it’s mustard algae: You can check the spot again in 12 to 24 hours. Because the live microscopic spores are still attached to the surface, the algae will literally grow back in the exact same shape and spot overnight, even if the wind didn’t blow at all.
Phase 1: The Gear Sterilization (The Step Everyone Skips)
Mustard algae doesn’t just live in your water; it can survive dry on physical surfaces for weeks. If you clear the pool but drop the same contaminated brush or wear the same swimsuits back into the water next weekend, you will re-infect your pool instantly.
Depending on what kind of gear you have, choose one of these sterilization protocols before you start treating the water:
Option A: The Bleach Bucket Soak (Best for hard plastics and cleaning tools)
The Mix: Grab a large 5-gallon bucket or a plastic storage bin and mix a 1:10 solution (one part liquid chlorine or household bleach to ten parts fresh water).
The Action: Submerge smaller items or use a rag/sponge to thoroughly wipe down long poles and large plastic items. Let them soak or sit wet for at least 30 minutes before rinsing with clean water.
Option B: The Pool-Water Dunk (Best for heavy-duty maintenance gear)
If you aren’t worried about slight fading on your plastic maintenance tools, you can let the pool do the work for you—but you have to time it right.
The Action: Drop your vacuum hoses, skim nets, and pool brushes directly into the pool right before you hit it with the triple-shock package in Phase 2.
The Caution: Leave them submerged for the first 24 hours of the chemical spike. Do not put expensive vinyl floats, custom pool covers, or soft inflatables in the pool during a nuclear shock, or the extreme chlorine levels will dry out the plastic and ruin them.
Option C: The Fabric Sanitization (Best for suits and life jackets)
Mustard algae spores easily trap themselves in the mesh lining of swim trunks and the porous fabric of life vests.
The Action: Throw all swimsuits, trunks, and microfiber towels into the washing machine on a hot cycle with a color-safe laundry detergent.
For Life Jackets: Do not run life vests through the washing machine. Instead, submerge them in a bucket of warm water mixed with a cup of standard, non-abrasive multi-purpose cleaner (like Clorox Multi-Surface) that kills organic spores without eating through the nylon safety straps. Keep them submerged for 30 minutes, then hang them in the direct sun to dry.
Phase 2: The Eradication Sequence
Before adding a single chemical, you must prepare the battlefield. Use a skim net to scoop out all large organic debris like leaves, twigs, or rocks. If you leave debris on the bottom, your chemicals will waste their power trying to oxidize dead leaves instead of killing the algae. Ensure all gear from your chosen sterilization path in Phase 1 is removed or properly staged.
- The Heavy-Duty Combo Brush Down:
Day 1 – Morning.
While standard nylon brushes are fine for light maintenance, a professional-grade Combo Brush (a 50/50 mix of nylon and stainless steel bristles) is your primary weapon. Nylon bristles provide flexibility to sweep loose spores into suspension, while the stiff stainless steel bristles mechanically slice through the tough, slimy biofilm armor protecting the algae. Vigorously scrape down all walls, steps, and tight corners to expose the live spores underneath. (Note: Only use combo brushes on plaster, gunite, or concrete pools. If you have a vinyl liner or fiberglass pool, stick to a stiff 100% nylon brush to avoid scratching the finish.) - The Over-Shock (Nuke It):
Day 1 – Immediate Follow-Up.
Now that the algae is exposed and suspended in the water, it’s time to drastically raise the sanitizer level. Mustard algae requires a triple-shock treatment—aiming for roughly 20 to 30 ppm of Free Chlorine depending on your Cyanuric Acid level. Always use liquid chlorine or dissolved shock, broadcasting it across the pool surface with the filtration pump running. - Add the Yellow Algaecide Accelerator:
Day 1 – Immediate Follow-Up.
Right after shocking, add a sodium bromide-based accelerator like United Chemical Yellow Treat. Sodium bromide works synergistically with high chlorine levels, converting into hyper-aggressive hypobromous acid to tear through the freshly exposed algae cells. Broadcast 5 ounces per 10,000 gallons across the surface. - Balance the pH Chaos:
Day 1 – 30-60 min. Follow-Up.
High shock levels naturally distort pH readings or drive them upward. Before wrapping up your Day 1 work, test your water and add muriatic acid or pH decreaser to bring your pH firmly back down into the 7.2 to 7.4 target range. This maximizes the efficiency of the massive chlorine spike you just introduced. Leave the filtration pump running continuously 24/7 from this point forward. - Vacuum the Fallout and Clean the Filter:
Day 2 – Morning.
By morning, the heavy shocking (especially if using Calcium Hypochlorite) will have left a layer of fine, powdery calcium dust and dead white/grey algae sediment settled on the pool floor. Slow-vacuum this debris directly to waste if you have a multiport valve, or vacuum it straight into your filter and immediately run a deep backwash cycle until the sight glass runs perfectly clear. If using cartridge filters, pull the elements and spray them down thoroughly with cartridge filter cleaner/degreaser. - The Post-Massacre Verification Test:
Day 2 – Mid-Day.
Once the pool has circulated for a few hours following your morning cleanup, it’s time to test the water. Because a “yellow massacre” consumes an immense amount of sanitizer, your chlorine levels will likely have cratered. Test your water; if your Free Chlorine has dropped below normal levels, add a standard maintenance dose of chlorine to bring your pool back up to its ideal baseline (typically 2 to 4 ppm) so it is safe, stable, and ready for swimmers.
Phase 3: Maintaining the Defensive Line
Mustard algae is an opportunistic hitchhiker. Once your water clears and your baseline chlorine is restored, your job shifts from eradication to fortification. If you leave the environment hospitable, any microscopic spore that survived or blows back into the pool will trigger a brand-new bloom.
To lock down your pool and prevent a re-bloom, add these proactive habits and validation steps to your weekly DIY maintenance routine:
1. Run the Overnight Chlorine Loss Test (OCLT)
Before you assume total victory, you need to verify that every single microscopic spore has been eradicated. Clear water does not always mean clean water.
The Proactive Task: Perform an OCLT. Check your Free Chlorine level right after the sun goes down, and check it again the next morning before the sun hits the water. If you lose more than 1.0 ppm of chlorine overnight, something organic is still alive and consuming your sanitizer. Keep the pool in a defensive posture until you pass this test with zero loss.
2. Starve the Algae with Phosphate Remover
Phosphates are literal fertilizer for algae. They enter your pool via lawn runoff, organic debris, and especially heavy rainstorms. While chlorine kills algae, low phosphate levels ensure that even if algae spores enter the water, they have no food supply to multiply.
The Proactive Task: Test your phosphate levels monthly, and always test right after a major rain event. If phosphates creep above 200 ppb (parts per billion), add a maintenance dose of a commercial-grade remover like Natural Chemistry PHOSfree.
The Professional Application: Never pour this chemical directly into your skimmer. Doing so sends a highly concentrated slug of chemical straight into your plumbing and forces it to trap inside the filter media before it can mix with the pool. Instead, pour it slowly around the perimeter of the pool or directly in front of the return inlets/jets. This uses the water flow to spread the chemical evenly throughout the entire pool, allowing it to bind to phosphates in the open water where it belongs.
3. Commit to the “Shade Brush” Routine
Mustard algae thrives in still water and low-light areas. Even if your water looks pristine, an invisible microfilm layer can begin forming in the shadows days before you see a physical yellow smudge.
The Proactive Task: Make it a rule to brush the pool walls at least once a week, paying extra attention to the “dead zones” where water circulation is poorest: behind steps, under the skimmer mouth, around pool lights, and the tight corners of the shallow end. Breaking up the biofilm mechanically allows your daily chlorine baseline to do its job.
4. Maintain an Elevated “Target Chlorine” Buffer
If your pool is prone to mustard algae infestations, running your Free Chlorine at the bare minimum baseline (1 to 2 ppm) leaves zero margin for error during a hot summer day or a sudden heavy swimmer load.
The Proactive Task: Intentionally run your pool at a slightly higher, defensive baseline of 3 to 5 ppm. This keeps a constant, aggressive residual sanitizer level ready to incinerate any new spores the second they blow into the water, giving you a buffer before the algae can anchor itself to your plaster.
A Note on Algaecides: Copper-based or silver-based algaecides can help inhibit future algae growth during the peak of summer, but remember they are preventatives, not cures. Focus your primary budget on physical brushing, phosphate management, and solid chlorine baselines—there are no chemical shortcuts to mechanical maintenance.
The Takeaway: Consistency Beats the Super-Bug
Defeating mustard algae isn’t about using a magic chemical; it’s about out-disciplining a highly resilient organism. If you treat it like standard green algae, it will exploit the shortcuts and return every single weekend. But by combining mechanical brushing to break its armor, aggressive chemical shocks to wipe out the live spores, and strict gear sterilization to prevent re-contamination, you can permanently reclaim your water.
Once your pool is clear, don’t let your guard down. Keep your data logged, track your chemical trends weekly, and maintain that defensive chlorine buffer. A few minutes of proactive maintenance every week is all it takes to keep your water crystal clear, your equipment running efficiently, and your backyard ready for swimmers all summer long.